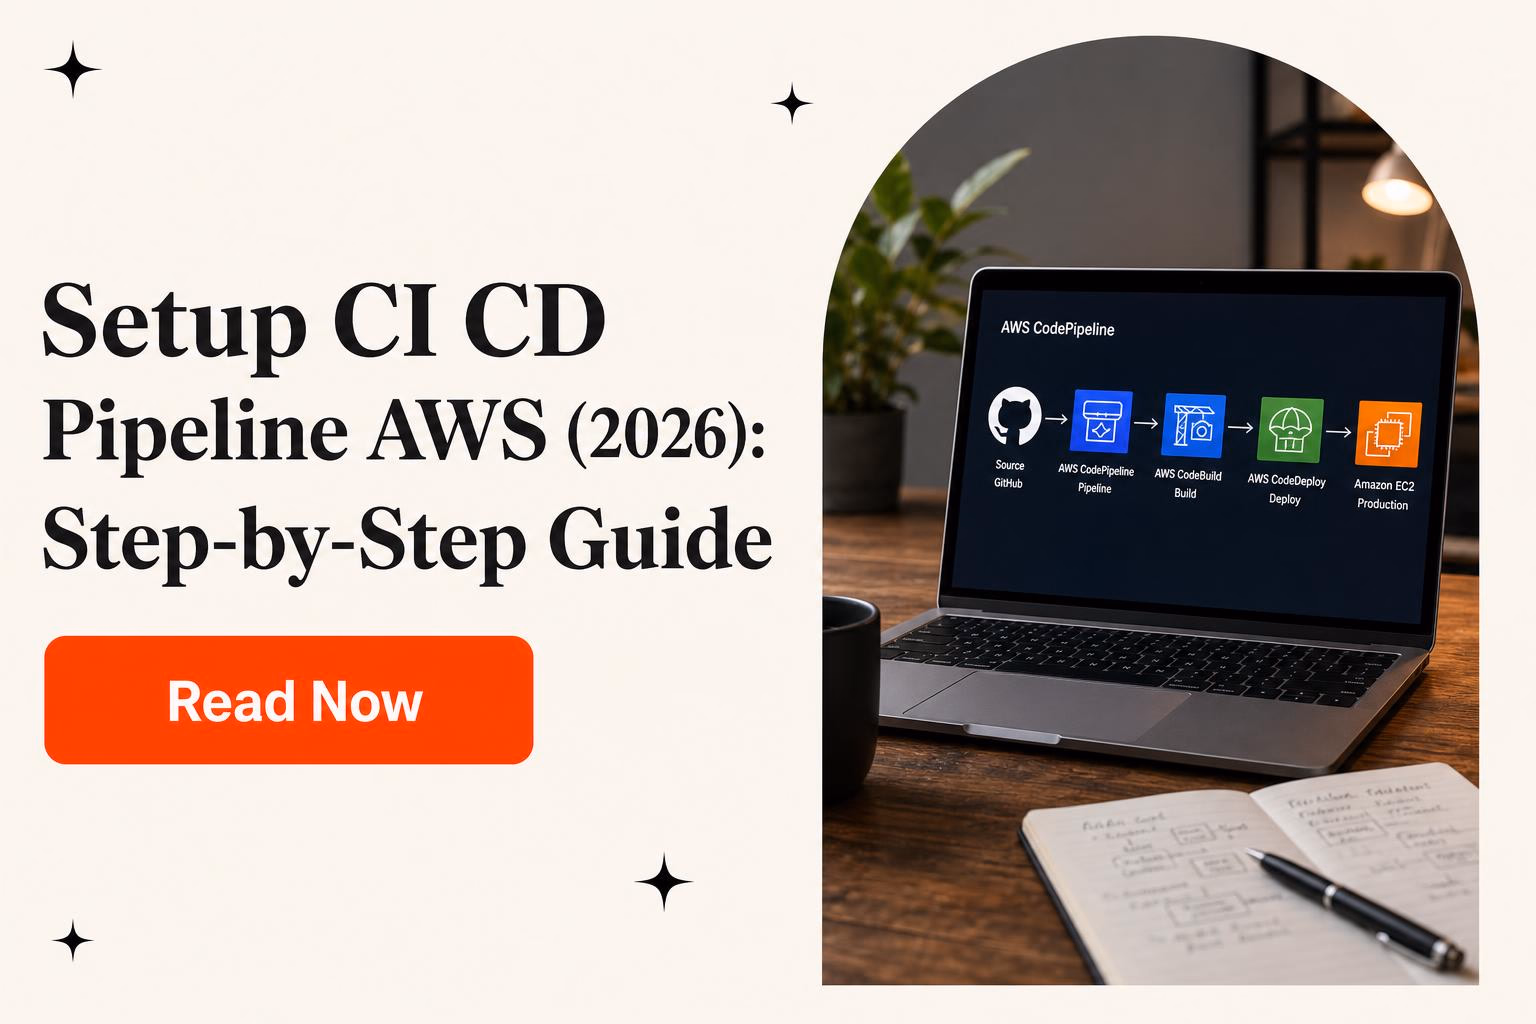
Setup CI CD Pipeline AWS (2026): Step-by-Step Guide
Setup CI CD Pipeline AWS in 2026 using CodePipeline, CodeBuild, and ECS. Follow our step-by-step guide to automate builds, tests, and deploys.
TL;DR
Setting up a CI/CD pipeline on AWS means wiring a source repository (usually GitHub) to AWS CodePipeline, CodeBuild, and CodeDeploy so every code push is automatically built, tested, and deployed. This guide walks through the actual setup, with CLI commands, buildspec files, CDK code, and console steps. Since December 2024, AWS creates V2 pipelines by default, which changes both configuration options and pricing. You’ll get a working pipeline by the end of this article.
A CI/CD pipeline automates the steps between writing code and shipping it to users. On AWS, a code push triggers a build, runs tests, packages an artifact (often a Docker image), and deploys it to a compute target. No manual intervention required.
This guide covers the hands-on setup. You’ll create a real pipeline from scratch, configure build caching, set up proper IAM roles, and deploy to ECS. If you’ve been fighting AWS docs and IAM errors for days, this is the walkthrough you need.
Prerequisites
Before starting, make sure you have:
- An AWS account with admin access (you’ll create scoped IAM roles during setup)
- AWS CLI v2 installed and configured (
aws configure) - A GitHub account with a repository containing your application code
- Docker installed locally (if deploying containers)
- Node.js 18+ (if using CDK)
Install the CDK if you haven’t:
npm install -g aws-cdk
cdk --version
AWS-Native CI/CD Services at a Glance
Before building, here’s what each service does in the pipeline:
CodePipeline is the orchestrator. It defines your release workflow as a series of stages (source, build, test, deploy) and connects every other service in the chain. It doesn’t build or deploy anything itself.
CodeBuild is the builder. It spins up a container, runs your build commands from a buildspec.yml file, and produces deployable artifacts. You pay per build minute.
CodeDeploy handles deployment to EC2 instances, ECS containers, Lambda functions, and on-premises servers. It supports in-place, blue/green, canary, and linear deployment strategies.
ECR (Elastic Container Registry) stores Docker images. If you’re deploying containers, ECR sits between the build and deploy stages.
One important note: AWS CodeCommit is effectively dead. GitHub is the default source provider for AWS CI/CD pipelines in 2026. Practitioners on Reddit consistently report that GitHub’s ecosystem and familiarity make it the obvious choice.
The flow you’re building:
Developer pushes code
  → GitHub webhook triggers CodePipeline
    → CodeBuild compiles, tests, pushes Docker image to ECR
      → CodeDeploy rolls out to ECS (blue/green)
        → Automatic rollback on health check failures
V1 vs V2 Pipelines: What Changed
Since December 9, 2024, AWS creates V2 pipelines by default through the SDK, CLI, CloudFormation, and CDK. If you’re setting up a pipeline today, you’re using V2 whether you realize it or not.
What V2 adds
| Feature | V1 | V2 |
|---|---|---|
| Pricing model | $1.00 per active pipeline/month | $0.002 per action execution minute |
| Free tier | 1 free active pipeline/month | 100 free action execution minutes/month |
| Git-based triggers | No | Yes (branch/tag filtering) |
| Parallel stages | No | Yes |
| Rollback support | Limited | Built-in |
| Pipeline-level variables | No | Yes |
V2’s per-minute pricing is cheaper for low-activity pipelines. A busy pipeline with 1,000 action minutes per month costs just $2 on CodePipeline itself. The real cost center is CodeBuild (covered below).
All CLI commands and CDK code in this guide target V2.
Step 1: Create an ECR Repository
First, create a place to store your Docker images:
aws ecr create-repository \
  --repository-name my-app \
  --region us-east-1 \
  --image-scanning-configuration scanOnPush=true
Note the repositoryUri in the output. You’ll need it in your buildspec. It looks like 123456789012.dkr.ecr.us-east-1.amazonaws.com/my-app.
Step 2: Write Your buildspec.yml
Create a buildspec.yml in your repository root. This file tells CodeBuild exactly what to do:
version: 0.2

env:
  variables:
    ECR_REPO: "123456789012.dkr.ecr.us-east-1.amazonaws.com/my-app"
    AWS_DEFAULT_REGION: "us-east-1"

phases:
  pre_build:
    commands:
      - echo Logging in to Amazon ECR...
      - aws ecr get-login-password --region $AWS_DEFAULT_REGION | docker login --username AWS --password-stdin $ECR_REPO
      - COMMIT_HASH=$(echo $CODEBUILD_RESOLVED_SOURCE_VERSION | cut -c 1-7)
      - IMAGE_TAG=${COMMIT_HASH:-latest}
  build:
    commands:
      - echo Building Docker image...
      - docker build -t $ECR_REPO:$IMAGE_TAG .
      - docker tag $ECR_REPO:$IMAGE_TAG $ECR_REPO:latest
  post_build:
    commands:
      - echo Pushing Docker image...
      - docker push $ECR_REPO:$IMAGE_TAG
      - docker push $ECR_REPO:latest
      - echo Writing image definitions file...
      - printf '[{"name":"my-app-container","imageUri":"%s"}]' $ECR_REPO:$IMAGE_TAG > imagedefinitions.json

artifacts:
  files:
    - imagedefinitions.json

cache:
  paths:
    - '/root/.npm/**/*'
    - '/root/.cache/pip/**/*'
The imagedefinitions.json artifact is what CodeDeploy uses to know which container image to deploy to ECS. The format must match your ECS task definition’s container name exactly.
Step 3: Create IAM Roles
This is where most people get stuck. Practitioners on Reddit consistently describe IAM permissions as the “trickiest part” of setting up a CI/CD pipeline on AWS. Here are the exact roles you need.
CodeBuild Service Role
Create a file called codebuild-trust-policy.json:
{
  "Version": "2012-10-17",
  "Statement": [
    {
      "Effect": "Allow",
      "Principal": {
        "Service": "codebuild.amazonaws.com"
      },
      "Action": "sts:AssumeRole"
    }
  ]
}
Create the role:
aws iam create-role \
  --role-name CodeBuildServiceRole \
  --assume-role-policy-document file://codebuild-trust-policy.json
Now attach the permissions. Do not use *:*. Here’s a scoped policy (codebuild-policy.json):
{
  "Version": "2012-10-17",
  "Statement": [
    {
      "Effect": "Allow",
      "Action": [
        "logs:CreateLogGroup",
        "logs:CreateLogStream",
        "logs:PutLogEvents"
      ],
      "Resource": "arn:aws:logs:us-east-1:123456789012:log-group:/aws/codebuild/*"
    },
    {
      "Effect": "Allow",
      "Action": [
        "ecr:GetAuthorizationToken"
      ],
      "Resource": "*"
    },
    {
      "Effect": "Allow",
      "Action": [
        "ecr:BatchCheckLayerAvailability",
        "ecr:GetDownloadUrlForLayer",
        "ecr:BatchGetImage",
        "ecr:PutImage",
        "ecr:InitiateLayerUpload",
        "ecr:UploadLayerPart",
        "ecr:CompleteLayerUpload"
      ],
      "Resource": "arn:aws:ecr:us-east-1:123456789012:repository/my-app"
    },
    {
      "Effect": "Allow",
      "Action": [
        "s3:GetObject",
        "s3:PutObject",
        "s3:GetBucketAcl",
        "s3:GetBucketLocation"
      ],
      "Resource": [
        "arn:aws:s3:::codepipeline-us-east-1-*",
        "arn:aws:s3:::codepipeline-us-east-1-*/*"
      ]
    }
  ]
}
aws iam put-role-policy \
  --role-name CodeBuildServiceRole \
  --policy-name CodeBuildPermissions \
  --policy-document file://codebuild-policy.json
CodePipeline Service Role
Same pattern. Create a trust policy for codepipeline.amazonaws.com, then attach permissions for S3 artifact access, CodeBuild start/stop, CodeDeploy create deployment, and ECS service update. The exact policy depends on your deployment target. AWS documents the minimum permissions for CodePipeline in detail.
Common mistake: Granting broad permissions “just to get it working” creates security debt that compounds. Start minimal and add permissions as needed. When you get an “AccessDenied” error, read the error message carefully. It tells you the exact action and resource to add.
Step 4: Connect GitHub to CodePipeline
You need a CodeStar connection to link GitHub to your pipeline. This replaces the old OAuth token method.
Via Console (quickest for first-time setup)
- Go to Developer Tools > Settings > Connections in the AWS Console
- Click Create connection
- Select GitHub as the provider
- Name it (e.g.,
my-github-connection) - Click Connect to GitHub, authorize the AWS app, and select your repository
- Note the connection ARN
Via CLI
aws codestar-connections create-connection \
  --provider-type GitHub \
  --connection-name my-github-connection
The connection starts in PENDING status. You must complete the handshake in the console by clicking Update pending connection and authorizing through GitHub. There’s no way around this manual step.
Step 5: Create the CodeBuild Project
aws codebuild create-project \
  --name my-app-build \
  --source type=CODEPIPELINE \
  --artifacts type=CODEPIPELINE \
  --environment type=LINUX_CONTAINER,computeType=BUILD_GENERAL1_SMALL,image=aws/codebuild/amazonlinux2-x86_64-standard:5.0,privilegedMode=true \
  --service-role arn:aws:iam::123456789012:role/CodeBuildServiceRole \
  --cache type=LOCAL,modes=[LOCAL_DOCKER_LAYER_CACHE,LOCAL_CUSTOM_CACHE]
Two critical flags here:
privilegedMode=trueis required for building Docker images inside CodeBuild. Without it, yourdocker buildcommands will fail.- The
cacheconfiguration enables Docker layer caching and custom caching. This alone can cut build times by 40 to 70%.
Step 6: Create the Pipeline
Option A: AWS CLI
Create a pipeline definition file (pipeline.json):
{
  "pipeline": {
    "name": "my-app-pipeline",
    "roleArn": "arn:aws:iam::123456789012:role/CodePipelineServiceRole",
    "pipelineType": "V2",
    "stages": [
      {
        "name": "Source",
        "actions": [
          {
            "name": "GitHubSource",
            "actionTypeId": {
              "category": "Source",
              "owner": "AWS",
              "provider": "CodeStarSourceConnection",
              "version": "1"
            },
            "outputArtifacts": [{"name": "SourceOutput"}],
            "configuration": {
              "ConnectionArn": "arn:aws:codestar-connections:us-east-1:123456789012:connection/xxxx",
              "FullRepositoryId": "your-org/your-repo",
              "BranchName": "main",
              "OutputArtifactFormat": "CODE_ZIP",
              "DetectChanges": "true"
            }
          }
        ]
      },
      {
        "name": "Build",
        "actions": [
          {
            "name": "DockerBuild",
            "actionTypeId": {
              "category": "Build",
              "owner": "AWS",
              "provider": "CodeBuild",
              "version": "1"
            },
            "inputArtifacts": [{"name": "SourceOutput"}],
            "outputArtifacts": [{"name": "BuildOutput"}],
            "configuration": {
              "ProjectName": "my-app-build"
            }
          }
        ]
      },
      {
        "name": "Deploy",
        "actions": [
          {
            "name": "DeployToECS",
            "actionTypeId": {
              "category": "Deploy",
              "owner": "AWS",
              "provider": "ECS",
              "version": "1"
            },
            "inputArtifacts": [{"name": "BuildOutput"}],
            "configuration": {
              "ClusterName": "my-cluster",
              "ServiceName": "my-service",
              "FileName": "imagedefinitions.json"
            }
          }
        ]
      }
    ],
    "triggers": [
      {
        "providerType": "CodeStarSourceConnection",
        "gitConfiguration": {
          "sourceActionName": "GitHubSource",
          "push": [
            {
              "branches": {
                "includes": ["main"]
              }
            }
          ]
        }
      }
    ]
  }
}
aws codepipeline create-pipeline \
  --cli-input-json file://pipeline.json
Option B: CDK (TypeScript)
For teams that prefer infrastructure as code, CDK gives you type safety and easier maintenance:
import * as cdk from 'aws-cdk-lib';
import * as codepipeline from 'aws-cdk-lib/aws-codepipeline';
import * as codepipeline_actions from 'aws-cdk-lib/aws-codepipeline-actions';
import * as codebuild from 'aws-cdk-lib/aws-codebuild';
import * as ecr from 'aws-cdk-lib/aws-ecr';
import * as ecs from 'aws-cdk-lib/aws-ecs';

export class PipelineStack extends cdk.Stack {
  constructor(scope: cdk.App, id: string, props?: cdk.StackProps) {
    super(scope, id, props);

    const repository = ecr.Repository.fromRepositoryName(
      this, 'Repo', 'my-app'
    );

    const sourceOutput = new codepipeline.Artifact();
    const buildOutput = new codepipeline.Artifact();

    const buildProject = new codebuild.PipelineProject(this, 'Build', {
      environment: {
        buildImage: codebuild.LinuxBuildImage.AMAZON_LINUX_2_5,
        privileged: true, // Required for Docker builds
        computeType: codebuild.ComputeType.SMALL,
      },
      cache: codebuild.Cache.local(
        codebuild.LocalCacheMode.DOCKER_LAYER,
        codebuild.LocalCacheMode.CUSTOM
      ),
      environmentVariables: {
        ECR_REPO: { value: repository.repositoryUri },
        AWS_DEFAULT_REGION: { value: this.region },
      },
    });

    // Grant CodeBuild permission to push to ECR
    repository.grantPullPush(buildProject);

    const sourceAction = new codepipeline_actions.CodeStarConnectionsSourceAction({
      actionName: 'GitHub',
      owner: 'your-org',
      repo: 'your-repo',
      branch: 'main',
      connectionArn: 'arn:aws:codestar-connections:us-east-1:123456789012:connection/xxxx',
      output: sourceOutput,
      triggerOnPush: true,
    });

    const buildAction = new codepipeline_actions.CodeBuildAction({
      actionName: 'DockerBuild',
      project: buildProject,
      input: sourceOutput,
      outputs: [buildOutput],
    });

    // Replace with your ECS service reference
    const ecsService = ecs.FargateService.fromFargateServiceAttributes(
      this, 'Service', {
        cluster: ecs.Cluster.fromClusterAttributes(this, 'Cluster', {
          clusterName: 'my-cluster',
          vpc: ec2.Vpc.fromLookup(this, 'Vpc', { isDefault: true }),
        }),
        serviceName: 'my-service',
      }
    );

    const deployAction = new codepipeline_actions.EcsDeployAction({
      actionName: 'DeployECS',
      service: ecsService,
      input: buildOutput,
    });

    new codepipeline.Pipeline(this, 'Pipeline', {
      pipelineType: codepipeline.PipelineType.V2,
      stages: [
        { stageName: 'Source', actions: [sourceAction] },
        { stageName: 'Build', actions: [buildAction] },
        { stageName: 'Deploy', actions: [deployAction] },
      ],
    });
  }
}
Deploy with:
cdk bootstrap   # Only needed once per account/region
cdk deploy
The CDK approach is particularly useful because it handles IAM role creation automatically. The repository.grantPullPush(buildProject) call generates exactly the right permissions, no manual policy writing required.
Step 7: Add a Test Stage
A pipeline without tests is just automated deployment of bugs. Add a test stage between build and deploy.
Create a separate CodeBuild project for tests, or add a test phase to your buildspec:
version: 0.2

phases:
  install:
    runtime-versions:
      nodejs: 18
    commands:
      - npm ci
  pre_build:
    commands:
      - echo Running linting...
      - npm run lint
  build:
    commands:
      - echo Running tests...
      - npm test -- --coverage
      - echo Running integration tests...
      - npm run test:integration
  post_build:
    commands:
      - echo Building Docker image...
      # Docker build commands from earlier

reports:
  jest-reports:
    files:
      - 'coverage/clover.xml'
    file-format: CLOVERXML
The reports section sends test coverage data to CodeBuild’s built-in reporting. You can view trends in the CodeBuild console without setting up a separate tool.
Step 8: Multi-Environment Promotion (Dev → Staging → Prod)
Most production setups need at least three environments. Here’s how to structure it.
V2 pipeline variables for environment-specific config
V2 pipelines support pipeline-level variables, which makes multi-environment deployment cleaner:
{
  "name": "DeployToStaging",
  "actions": [
    {
      "name": "DeployStaging",
      "actionTypeId": {
        "category": "Deploy",
        "owner": "AWS",
        "provider": "ECS",
        "version": "1"
      },
      "configuration": {
        "ClusterName": "staging-cluster",
        "ServiceName": "my-service-staging",
        "FileName": "imagedefinitions.json"
      }
    }
  ]
},
{
  "name": "ManualApproval",
  "actions": [
    {
      "name": "ApproveProd",
      "actionTypeId": {
        "category": "Approval",
        "owner": "AWS",
        "provider": "Manual",
        "version": "1"
      },
      "configuration": {
        "NotificationArn": "arn:aws:sns:us-east-1:123456789012:pipeline-approvals",
        "CustomData": "Approve deployment to production?"
      }
    }
  ]
},
{
  "name": "DeployToProduction",
  "actions": [
    {
      "name": "DeployProd",
      "actionTypeId": {
        "category": "Deploy",
        "owner": "AWS",
        "provider": "ECS",
        "version": "1"
      },
      "configuration": {
        "ClusterName": "production-cluster",
        "ServiceName": "my-service-prod",
        "FileName": "imagedefinitions.json"
      }
    }
  ]
}
The manual approval stage sends an SNS notification and pauses the pipeline until someone approves in the console or via CLI:
aws codepipeline put-approval-result \
  --pipeline-name my-app-pipeline \
  --stage-name ManualApproval \
  --action-name ApproveProd \
  --result summary="Looks good",status=Approved \
  --token <token-from-notification>
CodePipeline vs GitHub Actions: The Hybrid Pattern
This is the most debated question in AWS CI/CD circles. Practitioners on Reddit and in community forums are blunt: GitHub Actions’ developer experience is “head and shoulders above CodePipeline and CodeBuild.” Almost every developer you hire already knows GitHub, many know GitHub Actions, but few know CodePipeline.
That said, CodePipeline shines for workloads deeply integrated with AWS services, especially where compliance and least-privilege access matter.
The pattern most teams adopt
Use GitHub Actions for fast feedback on pull requests and CodePipeline for production deployment:
# .github/workflows/pr-checks.yml
name: PR Checks
on:
  pull_request:
    branches: [main]

jobs:
  test:
    runs-on: ubuntu-latest
    steps:
      - uses: actions/checkout@v4
      - uses: actions/setup-node@v4
        with:
          node-version: 18
          cache: 'npm'
      - run: npm ci
      - run: npm run lint
      - run: npm test -- --coverage
      - run: npm run build
GitHub Actions handles the quick PR checks (linting, unit tests, type checking). When the PR merges to main, CodePipeline picks up the change and handles the actual deployment through the AWS-native flow you set up above.
This gives developers fast feedback in their familiar GitHub environment while keeping production deploys tightly integrated with AWS IAM and deployment controls.
Deployment Targets: Configuration Differences
The deployment target shapes your buildspec and pipeline configuration.
ECS (Fargate)
The most common containerized target. The pipeline configuration shown above covers this. Your buildspec produces an imagedefinitions.json file, and the ECS deploy action updates the service.
For blue/green deployments on ECS, switch from the ECS deploy provider to CodeDeployToECS:
{
  "actionTypeId": {
    "category": "Deploy",
    "owner": "AWS",
    "provider": "CodeDeployToECS",
    "version": "1"
  },
  "configuration": {
    "ApplicationName": "my-app-deploy",
    "DeploymentGroupName": "my-app-dg",
    "TaskDefinitionTemplateArtifact": "BuildOutput",
    "AppSpecTemplateArtifact": "BuildOutput",
    "AppSpecTemplatePath": "appspec.yaml"
  }
}
You’ll also need an appspec.yaml in your build output:
version: 0.0
Resources:
  - TargetService:
      Type: AWS::ECS::Service
      Properties:
        TaskDefinition: <TASK_DEFINITION>
        LoadBalancerInfo:
          ContainerName: "my-app-container"
          ContainerPort: 8080
EKS (Kubernetes)
CodePipeline doesn’t manage Kubernetes directly. Use CodeBuild to run kubectl or helm:
# buildspec-deploy-eks.yml
version: 0.2

phases:
  install:
    commands:
      - curl -LO "https://dl.k8s.io/release/$(curl -L -s https://dl.k8s.io/release/stable.txt)/bin/linux/amd64/kubectl"
      - chmod +x kubectl && mv kubectl /usr/local/bin/
      - aws eks update-kubeconfig --name my-cluster --region us-east-1
  build:
    commands:
      - kubectl set image deployment/my-app my-app-container=$ECR_REPO:$IMAGE_TAG
      - kubectl rollout status deployment/my-app --timeout=300s
Lambda
For Lambda deployments using SAM:
# buildspec-lambda.yml
version: 0.2

phases:
  install:
    commands:
      - pip install aws-sam-cli
  build:
    commands:
      - sam build
      - sam package --s3-bucket my-deploy-bucket --output-template-file packaged.yaml

artifacts:
  files:
    - packaged.yaml
Then use a CloudFormation deploy action in your pipeline instead of ECS.
Build Caching: The Trick That Saves 40–70% on Costs
Without caching, CodeBuild downloads every dependency and rebuilds every Docker layer on every single build. This is the most common source of unexpectedly high AWS bills from CI/CD.
Enable all three cache types
In your CodeBuild project configuration, enable local caching:
aws codebuild update-project \
  --name my-app-build \
  --cache type=LOCAL,modes=[LOCAL_DOCKER_LAYER_CACHE,LOCAL_CUSTOM_CACHE,LOCAL_SOURCE_CACHE]
Optimize your Dockerfile for layer caching
Docker layer caching only helps if your Dockerfile is structured correctly. Put dependency installation before source code copying:
FROM node:18-alpine

WORKDIR /app

# Setup CI CD Pipeline AWS (2026): Step-by-Step Guide
COPY package.json package-lock.json ./
RUN npm ci --production

# Source code changes on every commit
COPY . .
RUN npm run build

EXPOSE 8080
CMD ["node", "dist/server.js"]
If you put COPY . . before RUN npm ci, every code change invalidates the dependency cache and forces a full reinstall.
Add dependency caching to buildspec
cache:
  paths:
    - 'node_modules/**/*'
    - '/root/.npm/**/*'
    - '/root/.m2/**/*'        # For Java/Maven
    - '/root/.cache/pip/**/*' # For Python
With these three changes, expect build times to drop from 5–8 minutes to 1–3 minutes on typical Node.js or Python projects.
Secrets Management
Store secrets in AWS Secrets Manager or Systems Manager Parameter Store. Never in environment variables, never committed to source control.
Reference secrets in your buildspec:
env:
  secrets-manager:
    DB_PASSWORD: "prod/my-app/db:password"
    API_KEY: "prod/my-app/api:key"
  parameter-store:
    CONFIG_VALUE: "/my-app/config/value"
CodeBuild pulls these at build time without exposing them in logs. You’ll need to add secretsmanager:GetSecretValue to your CodeBuild IAM role for the specific secret ARNs.
Security: Service Control Policies for Multi-Account
For multi-account setups (which you should use for any serious production workload), configure AWS Service Control Policies (SCPs) at the Organizations level. The goal is to make sure the only deployment path to production goes through the pipeline:
{
  "Version": "2012-10-17",
  "Statement": [
    {
      "Sid": "DenyDirectECSUpdates",
      "Effect": "Deny",
      "Action": [
        "ecs:UpdateService",
        "ecs:RegisterTaskDefinition"
      ],
      "Resource": "arn:aws:ecs:us-east-1:PROD_ACCOUNT_ID:*",
      "Condition": {
        "StringNotLike": {
          "aws:PrincipalArn": "arn:aws:iam::PROD_ACCOUNT_ID:role/CodePipeline*"
        }
      }
    }
  ]
}
This prevents anyone from deploying directly using personal IAM credentials while still allowing the pipeline role to operate.
Common Mistakes and How to Fix Them
These come up repeatedly in practitioner discussions and post-mortems.
1. Overly permissive IAM roles. The temptation to grant *:* permissions “just to get it working” is strong when you’re hitting AccessDenied errors every five minutes. Resist it. Read the error message, it tells you the exact action and resource to add.
2. No build caching. Without Docker layer caching and dependency caching, build costs scale linearly with commit frequency. See the caching section above.
3. Static pipeline definitions that fight your branching strategy. AWS CodePipeline requires a static pipeline definition. Each stage is defined in CDK, Terraform, or the console. If your workflow needs to vary between branches, you either need multiple pipelines or creative use of V2 pipeline variables and trigger filtering:
"triggers": [{
  "providerType": "CodeStarSourceConnection",
  "gitConfiguration": {
    "push": [{
      "branches": {
        "includes": ["main", "release/*"],
        "excludes": ["feature/*"]
      }
    }]
  }
}]
4. Skipping automated tests. A pipeline without tests is just automated deployment of bugs. Even a minimal smoke test catches regressions before users do.
5. Trying to build everything at once. As one practitioner put it: “Don’t try to build everything at once.” Start with a source-to-deploy pipeline for one service. Add test stages, caching, multi-environment promotion, and blue/green deployments incrementally.
Verifying Your Pipeline Works
After setup, trigger a test run:
aws codepipeline start-pipeline-execution \
  --name my-app-pipeline
Watch the execution:
aws codepipeline get-pipeline-execution \
  --pipeline-name my-app-pipeline \
  --pipeline-execution-id <execution-id>
Or, more practically, push a small change to your main branch and watch the pipeline trigger automatically in the CodePipeline console. If a stage fails, check the CodeBuild logs:
aws logs get-log-events \
  --log-group-name /aws/codebuild/my-app-build \
  --log-stream-name <log-stream-from-build>
Measuring Success: DORA Metrics
Once your pipeline is running, track these four metrics:
- Deployment frequency: How often you ship to production
- Lead time for changes: Time from commit to production
- Change failure rate: Percentage of deployments causing incidents
- Mean time to recovery (MTTR): How fast you fix failures
Elite teams deploy on demand (multiple times per day), have lead times under one hour, recover from failures in under one hour, and maintain change failure rates of 0 to 15%. A well-configured AWS CI/CD pipeline is the foundation for hitting these targets.
When to Bring in Help
A production-grade CI/CD pipeline setup on AWS, covering multi-environment deployment, proper IAM roles, caching, and monitoring, takes one to three days for an experienced DevOps engineer. If your team is learning as they go, expect a week or more of trial and error, mostly fighting IAM permissions.
This is a well-defined deliverable with clear acceptance criteria, which makes it easy to scope as a milestone-based project. Horizon Labs has set up CI/CD and DevOps infrastructure for YC-backed startups including Arketa, where the team automated multi-environment deployments with Docker and Kubernetes as the company scaled to 30+ employees. Details on that and other projects are on the clients page.
If your developers are spending days debugging IAM instead of building product, get a free estimate and have it done in days.
FAQ
How long does it take to set up a CI/CD pipeline on AWS?
A basic pipeline (source, build, deploy to a single environment) can be running in a few hours using the steps above. A production-grade setup with multi-environment promotion, caching, proper IAM roles, blue/green deployments, and monitoring typically takes one to three days for an experienced DevOps engineer. Teams new to AWS CI/CD should budget a week or more.
What does an AWS CI/CD pipeline cost per month?
CodePipeline V2 costs $0.002 per action execution minute, with 100 free minutes per month. The real expense is CodeBuild, where you pay per build minute based on instance size. A small team running a few builds per day on general1.small instances might spend $10 to $30 per month. Without caching optimizations, that can balloon to several hundred dollars on active repositories.
Should I use CodePipeline or GitHub Actions for AWS deployments?
For most teams in 2026, use both. GitHub Actions for fast PR feedback (linting, unit tests, type checks) and CodePipeline for production deployment. This hybrid pattern gives developers fast feedback in GitHub while keeping production deploys tightly integrated with AWS IAM and compliance controls.
Is AWS CodeCommit still worth using?
No. GitHub is the default source provider for AWS CI/CD pipelines today. CodeCommit saw limited innovation, and the developer ecosystem around GitHub (Actions marketplace, integrations, community) is far larger.
What’s the difference between CodePipeline V1 and V2?
V2 became the default in December 2024. It adds git-based triggers with branch/tag filtering, pipeline-level variables, parallel execution within stages, and rollback capabilities. Pricing changed from a flat $1/pipeline/month (V1) to $0.002/action execution minute (V2). New pipelines should always use V2.
What deployment strategy should I use?
Blue/green deployments (supported natively for ECS via CodeDeploy) let you run the new version alongside the old and switch traffic instantly, with instant rollback. Canary deployments route a small percentage of traffic first. In-place deployments are simpler but offer no rollback path. For most production workloads, blue/green is the right default.
How do I keep my AWS CI/CD pipeline costs low?
Three things matter most: enable Docker layer caching in CodeBuild, use LOCAL_CUSTOM_CACHE for dependency packages, and structure your Dockerfile so dependencies are installed before source code is copied. Together, these practices reduce build costs by 40 to 70%. Also check your CodeBuild instance types. Defaulting to a larger instance than needed wastes money on every build.
Can I set up a CI/CD pipeline on AWS without containers?
Yes. CodeDeploy supports deploying directly to EC2 instances and Lambda functions without containers. For Lambda, use SAM or CloudFormation to package and deploy function code. For EC2, CodeDeploy handles rolling updates to your application directly. Containers are common but not required.
Whether you're validating an idea, scaling an existing product, or need senior engineering support—We help companies build ideas into apps their customers will love (without the engineering headaches). US leadership with American & Turkish delivery teams you can trust.
Need Developers?
We help companies build ideas into apps their customers will love (without the engineering headaches). US leadership with American & Turkish delivery teams you can trust.


For Startups & Founders
We've been founders ourselves and know how valuable the right communities, tools, and network can be, especially when bootstrapped. Here are a few that we recommend.

Top 11 Software Development Companies for Small Businesses
Discover the top 11 software development companies helping small businesses grow with custom apps, AI solutions, and expert engineering support.
Read more
Mistakes to Avoid When Building Your First Product
Learn the key mistakes founders make when building their first product—and how to avoid them for a faster, smoother launch.
Read more
The Rise of AI in Product Development: What Startups Need to Know
Learn how AI is transforming product development for startups. From MVPs to scaling, here’s what founders need to know in today’s AI-driven world.
Read more
What is Mixpanel?
Learn how Mixpanel helps startups track user behavior to improve products and accelerate growth with clear data-driven insights.
Read more
How Tawk.to Can Boost Your Startup’s Customer Support Game
Learn how Tawk.to can benefit startups by enhancing customer support and engagement. Perfect for early-stage founders!
Read moreGrow Your Startup With Anthropic's AI-Powered Tools
Discover how Anthropic's cutting-edge AI tools can accelerate your startup's success. Learn about their benefits and see why they can be trusted by startups.
Read more
What is Data-Driven VC?
Learn what a data-driven VC means and how such investors can benefit your startup’s growth and fundraising journey.
Read more
What is Blockchain?
A beginner-friendly guide on blockchain for startup founders, covering key concepts, benefits, challenges, and how to leverage it effectively.
Read more
What is Cybersecurity?
Learn cybersecurity basics tailored for startup founders. Understand key risks, best practices, and how to protect your startup from tech threats.
Read more
What is Seedcamp?
Learn what Seedcamp is, how its European seed fund works, and how founders can use its capital, mentorship, and network to scale their companies.
Read more
What is AngelList?
AngelList is a prime platform connecting startup founders to investors, talent, and resources to accelerate early-stage growth.
Read more
What is 500 Startups?
Learn what 500 Startups (now 500 Global) is, how its accelerator and seed fund work, and when founders should consider it—plus tips for early-stage startups.
Read more